
Manually creating your AP Export file
Only invoices currently in the Paybox are eligible for the AP Export process.
To manually create an AP Export file,
Go to the Custom Financial Report module.
This will open the AP File tool where you can:
Generate an AP Export File
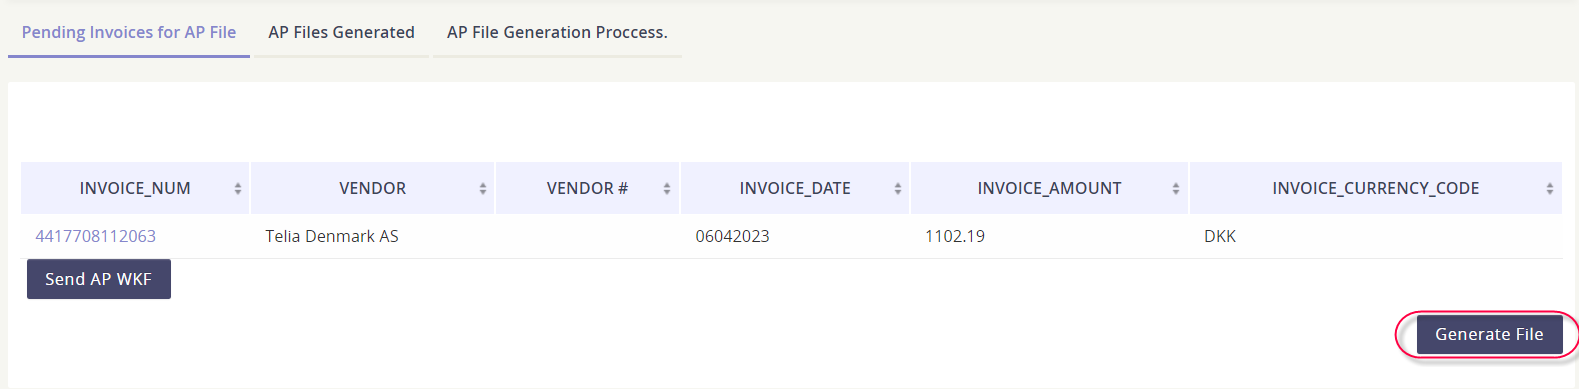
Make sure you are in the tab entitled Pending Invoices for AP File
All eligible invoices will be listed.
Click the action button Generate File.
Download your AP Export Files
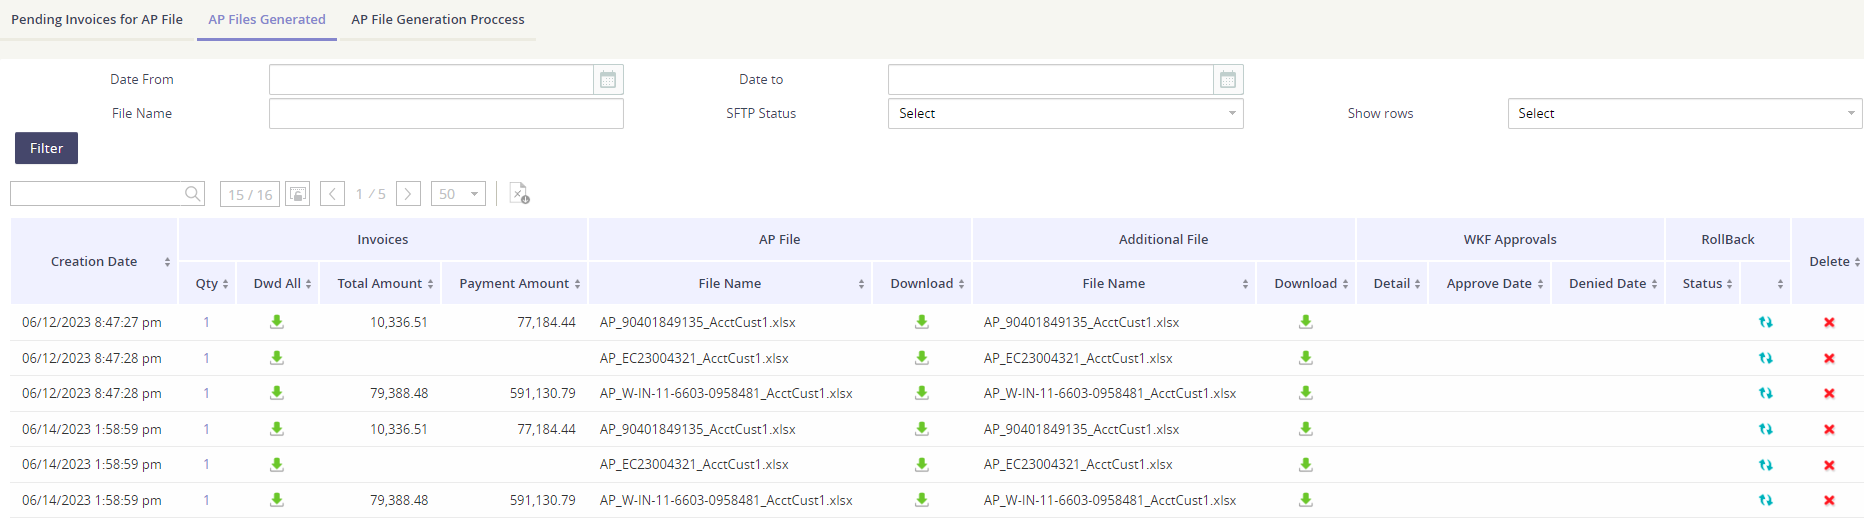
Head on over to the AP Files Generated tab to view and download all AP Export files that are generated in the platform. Don’t forget that you can use the Filter section to narrow your AP Export file results.
For each AP Export row, you have the ability to:
Download all the invoices that were part of the AP Export batch
Download the AP Export file and any supporting files
Rollback an AP Export
Delete an AP Export row
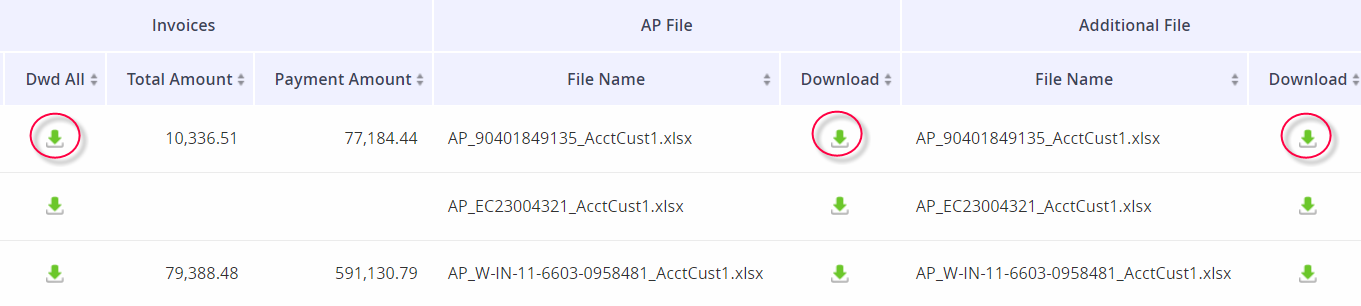
How to download files
Simply look for the green download arrow! Click on the icon to download the invoice, AP Export, or supporting files.
Rollback an AP Export
[Coming soon!]
Delete an AP Export
While in the AP Files Generated tab, locate the AP Export record and then click the red x icon to remove the client payment file.
Before you delete your AP Export - make sure you want to make this permanent action. You cannot undo this action.
View the status of your AP Exports
You can track the workflow status of your AP Export in the tab called AP File Generation Process. This module will show the status, if any errors were encountered, and details of each workflow process.
